A Simplified Oveview of the IVF Process
IVF can feel incredibly overwhelming. I’ve been there too, trying to wrap my head around all the details and enduring the waiting game before finally reaching that much-anticipated embryo transfer. To make matters more challenging, many fertility clinics provide only limited information during the process. While this is meant to avoid overwhelming patients, some of us thrive on understanding every detail and just need to know what’s happening every step of the way. So, I’ve put together a simplified overview of the IVF process to help provide some clarity as you enter your IVF journey!
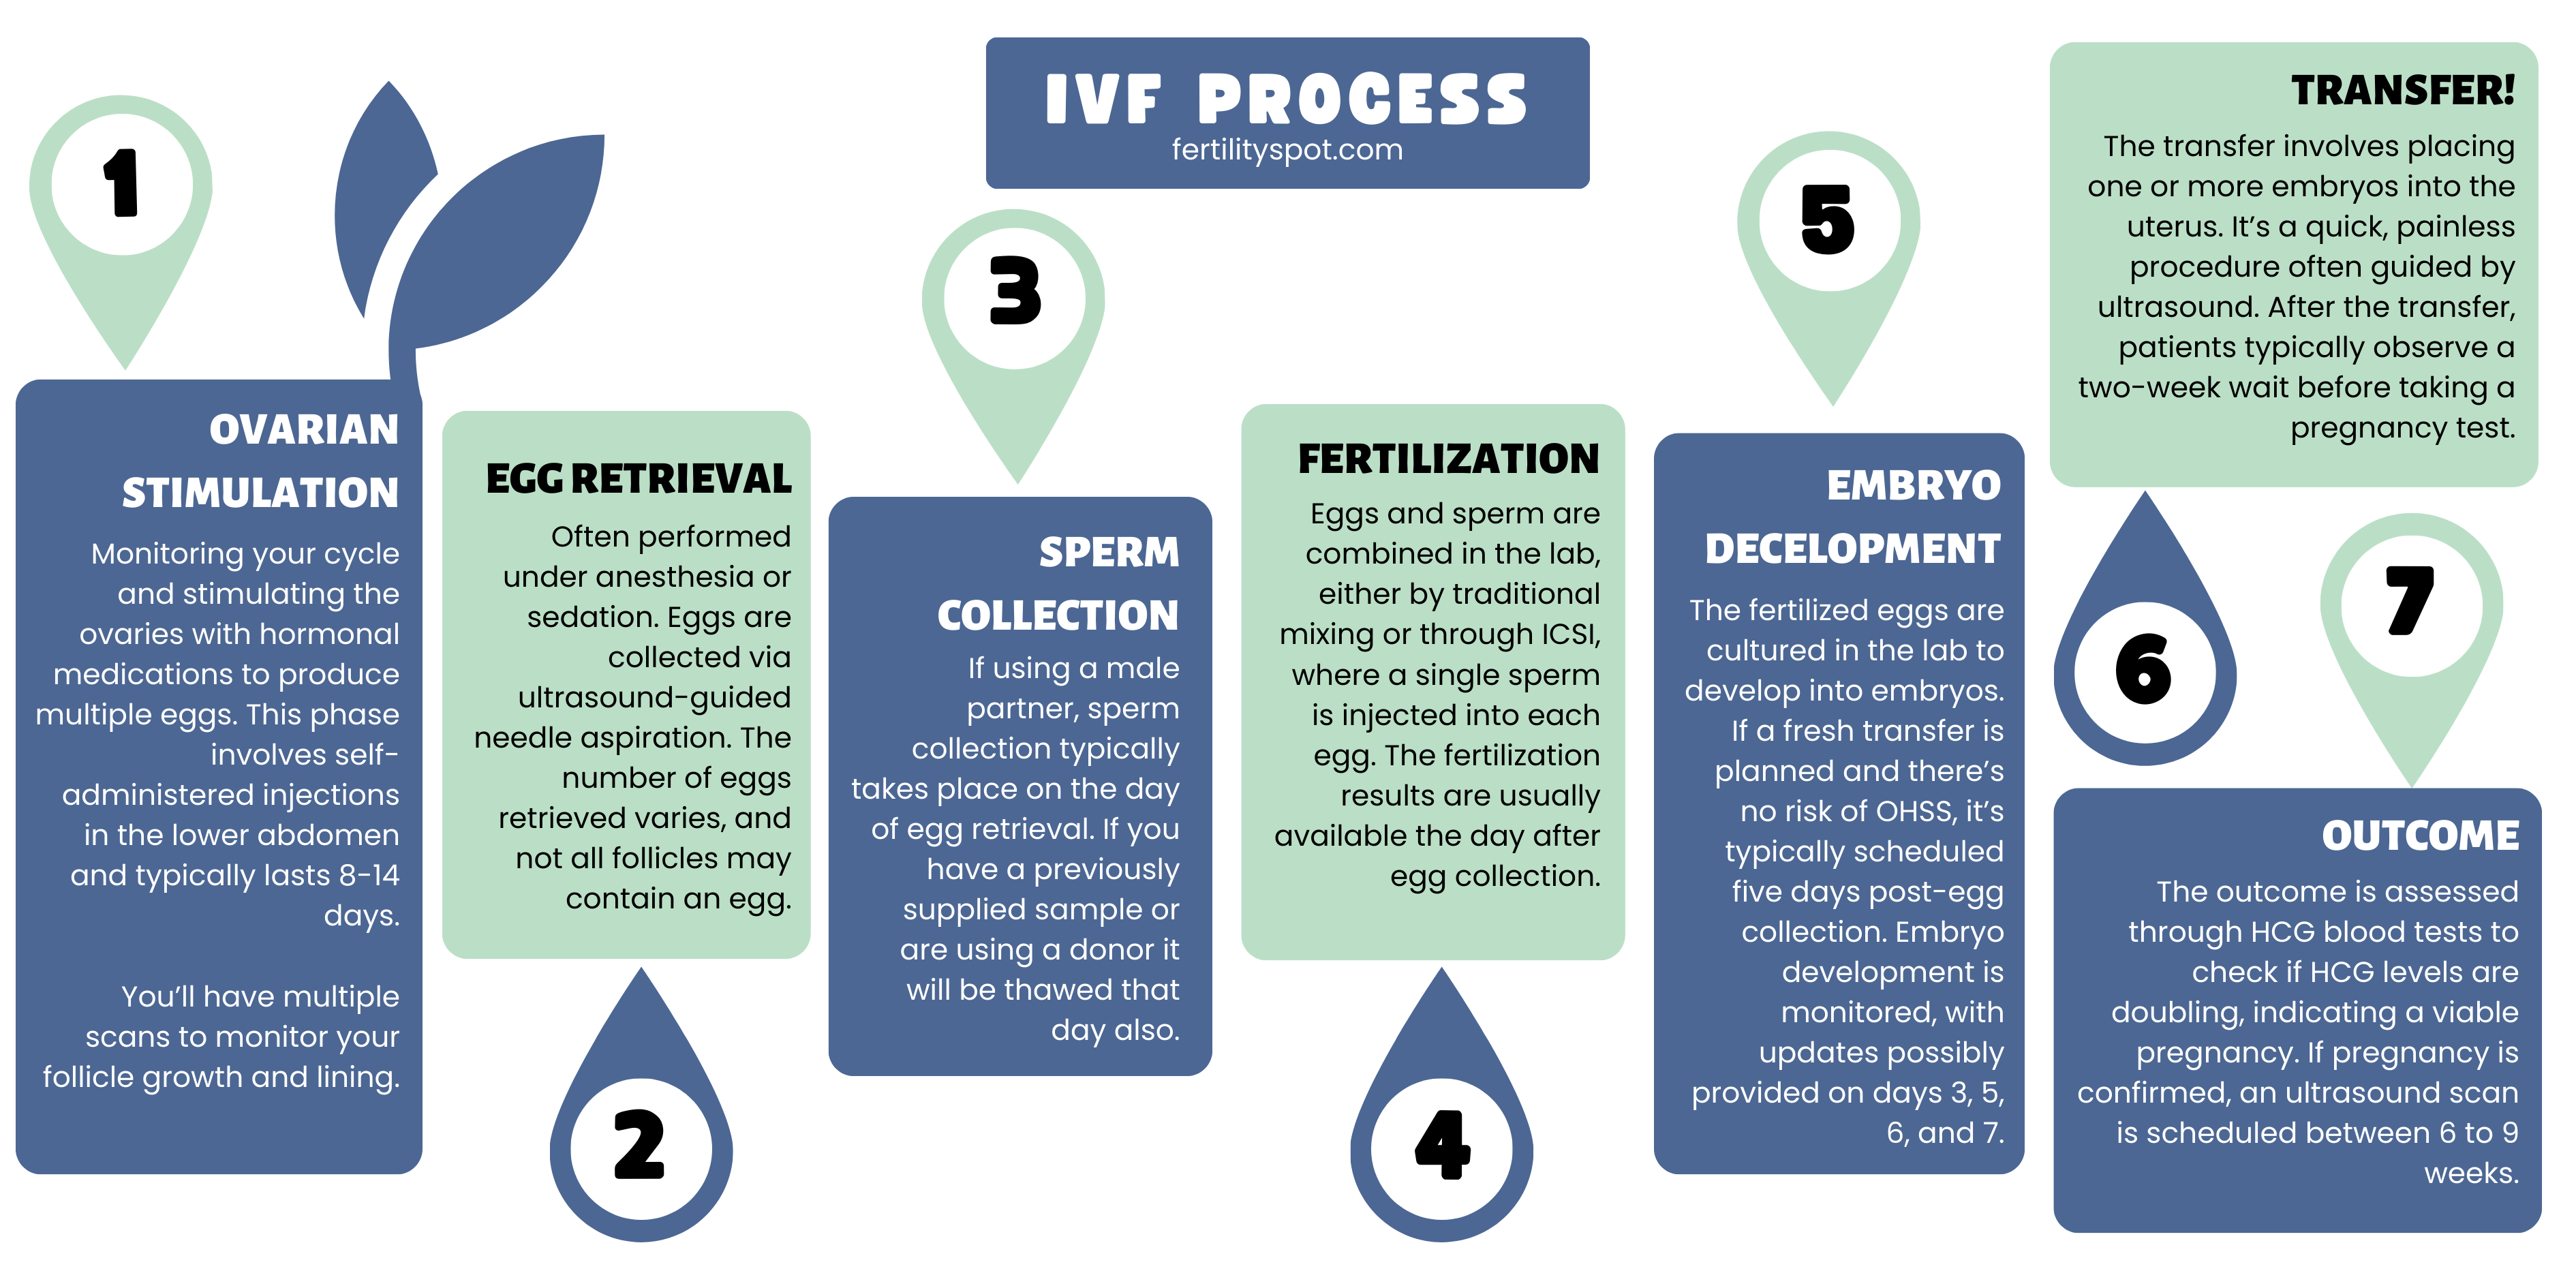
A typical IVF cycle includes several key stages: Ovulation Stimulation, Egg Retrieval, Sperm Collection, Fertilization, Embryo Development, and Embryo Transfer. You can have a fresh transfer as early as 16 days after starting stimulation medication.
The IVF Process Summarised
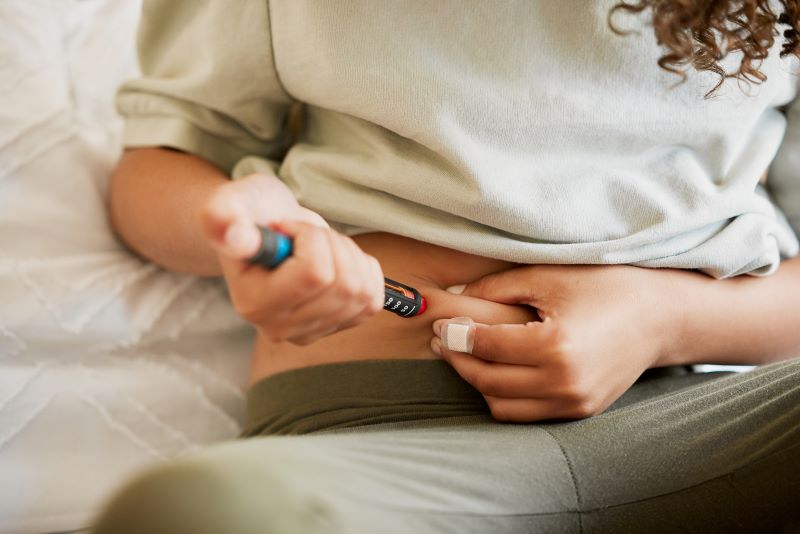
- Ovulation Stimulation: The journey begins by monitoring the menstrual cycle and stimulating the ovaries with hormonal medications to produce multiple eggs. This phase involves self-administered injections in the lower abdomen and may include additional medication to improve egg quality.
- Egg Retrieval: This stage can be anxiety-inducing but is generally brief and painless, often performed under anesthesia or sedation. Eggs are collected via ultrasound-guided needle aspiration. The number of eggs retrieved varies, and not all follicles may contain an egg.
- Sperm Collection: Sperm is collected either from a partner or a donor, typically on the day of or just before egg retrieval if using a male partner. The process involves masturbation or other methods like testicular aspiration in certain cases.
- Fertilization: Eggs and sperm are combined in the lab, either by traditional mixing or through ICSI, where a single sperm is injected into each egg. The fertilization results are usually available the day after egg collection.
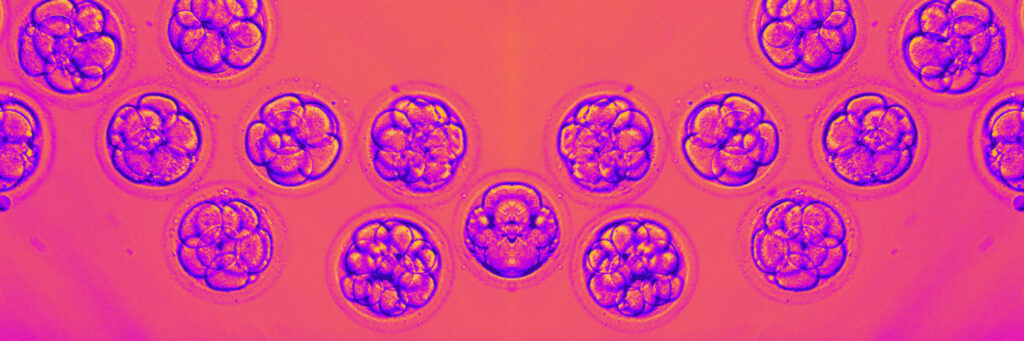
- Embryo Development: The fertilized eggs are cultured in the lab to develop into embryos. If a fresh transfer is planned and there’s no risk of OHSS, it’s typically scheduled five days post-egg collection. Embryo development is monitored, with updates possibly provided on days 3 and 5.
- Embryo Transfer: The transfer involves placing one or more embryos into the uterus. It’s a quick, painless procedure often guided by ultrasound. After the transfer, patients typically observe a two-week wait before taking a pregnancy test.
- Outcome: The outcome is assessed through HCG blood tests to check if HCG levels are doubling, indicating a viable pregnancy. If pregnancy is confirmed, an ultrasound scan is scheduled between 6 to 9 weeks.
Ovulation Stimulation
Your IVF journey begins by carefully monitoring your menstrual cycle and stimulating your ovaries to produce multiple eggs. This involves using tailored hormonal medications, which are self-administered injections in the lower abdomen (specifically, below your belly button and above your pelvic area). You may also receive additional medication to improve egg quality.
Pro Tip: Personally, I had my husband handle my injections, which turned out to be a great way to involve him in the process. If you have a partner, a close friend, or a family member whom you’re comfortable including in your journey, I highly recommend letting them assist you with the injections.
The Ovulation Stimulation Process
- Start stimulation medications: This initial step typically lasts 8 to 14 days, depending on your treatment plan. You might either:
- Call your clinic on day #1 of your cycle, they will then instruct you to begin medications
- Be put on ‘The Pill’ A.K.A Down-Regulation to control your cycle timing, in that case, your clinic will provide you with a schedule of when you will start your medications in advance
- Prevent Ovulation: A few days into the stimulation phase, you’ll introduce another medication to prevent premature ovulation.
- Follicle and Lining Scans: Multiple scans will be performed to assess the growth of your follicles and the condition of your uterine lining. These scans guide adjustments to your medication regimen and determine the timing of your egg retrieval.
- Schedule Egg Collection: When the majority of your follicles reach an optimal size, typically around 17-20mm, your doctor will schedule your egg collection.
- Trigger Injection: Generally, you’ll administer a trigger injection about 36 hours before your egg retrieval procedure.
You may find you get quite bloated during stimulation, this is completely normal! Remember, the size of your ovaries increases significantly during this time due to the development of multiple follicles.
It’s also important to note that not all follicles will contain an egg, how many will contain eggs varies widely by person and their reason for treatment. Personally, in my first round all follicles contained an egg, but for my second round around 3 didn’t, so out of 15 follicles seen on the scan, only 12 eggs were retrieved. You can get more insight into other Fertility Spot members’ outcomes in our journey hub
Egg Collection/Retrieval
The egg retrieval stage can often be the most anxiety-inducing part of the entire IVF process. It’s a brief procedure, and the experience can vary depending on your location and medical practices. In some cases, you may undergo the procedure under anesthesia, while in others, you’ll receive pain relief and light sedation. If you remain awake during the procedure, any discomfort you feel should generally be minimal, and the process is typically painless. However, if you do experience any pain, it’s crucial to promptly inform your doctor so that they can make necessary adjustments to your medication.
You will be informed of how many eggs are collected immediately after the procedure. You will receive an update on how many are mature the following day, at the same time you receive your fertilization results.
It’s worth noting that practices regarding anesthesia during egg retrieval can differ between countries. In the United States, the preference often leans toward using anesthesia, while in some other countries, patients may be kept awake with the aid of pain relief and light sedation.
Following either procedure, you will likely experience tenderness, and it’s recommended that you rest for the day. You will not be permitted to drive due to the effects of the medication. Assuming you do not develop Ovarian Hyperstimulation Syndrome (OHSS), you should return to normalcy by the next day. However, if OHSS does develop, the severity can vary from discomfort to pain that lasts until your next menstrual cycle.
I personally didn’t develop OHSS with my first egg collection (17 eggs collected), and besides being tired from the medication I was back to normal that evening. For my second egg collection (12 eggs collected), I did get mild OHSS, I was quite uncomfortable and tired for around 7 days with the odd sharp pains, and all symptoms completely resolved as soon as my cycle started.
Fun Fact: Many fertility patients have adopted a quirky tradition of indulging in McDonald’s fries after egg collection. While it might seem like a superstition, this practice stems from the theory that the salt in the fries can help prevent OHSS, though this theory has limited scientific support.
The Egg Collection Procedure
- Pre-Procedure Preparation: Before the procedure, you’ll typically be given instructions about fasting and may be asked to avoid certain medications. The timing is carefully coordinated with your ovarian stimulation phase.
- Anesthesia or Sedation: On the day of the procedure, you’ll usually be given either general anesthesia or sedative medications to keep you comfortable and pain-free. The choice between these options depends on the clinic’s protocols and your individual needs.
- Ultrasound-Guided Retrieval: The doctor uses transvaginal ultrasound to visualize the ovaries and the mature follicles. A thin needle is attached to the ultrasound probe, and this needle is carefully guided through the vaginal wall into the ovaries.
- Follicular Aspiration: The doctor aspirates the fluid from the follicles, which contain the eggs. This fluid is handed over to the embryology lab, where it is immediately examined under a microscope to identify and isolate the eggs.
- Post-Procedure Recovery: After the retrieval, you’ll be taken to a recovery area where you’ll be monitored for any immediate post-procedural complications like bleeding or severe pain. The procedure typically takes about 20-30 minutes, but you might stay in the recovery area for a few hours.
- Home Rest: It’s common to experience some cramping, bloating, or light spotting after the procedure. You’ll generally be advised to rest for the remainder of the day and avoid strenuous activities.
- Follow-Up: Your doctor will provide instructions on what to expect post-procedure and when to call the clinic, particularly if you experience any concerning symptoms like severe pain, heavy bleeding, or signs of infection.
Sperm Collection
If you have a male partner and you are using their sperm, collection will take place on the day of or just before egg retrieval. This is usually done through masturbation, although other methods like testicular aspiration may be used in certain cases where there are issues with sperm production or ejaculation.
If you are using a donor, their sample will be thawed on the day of collection.
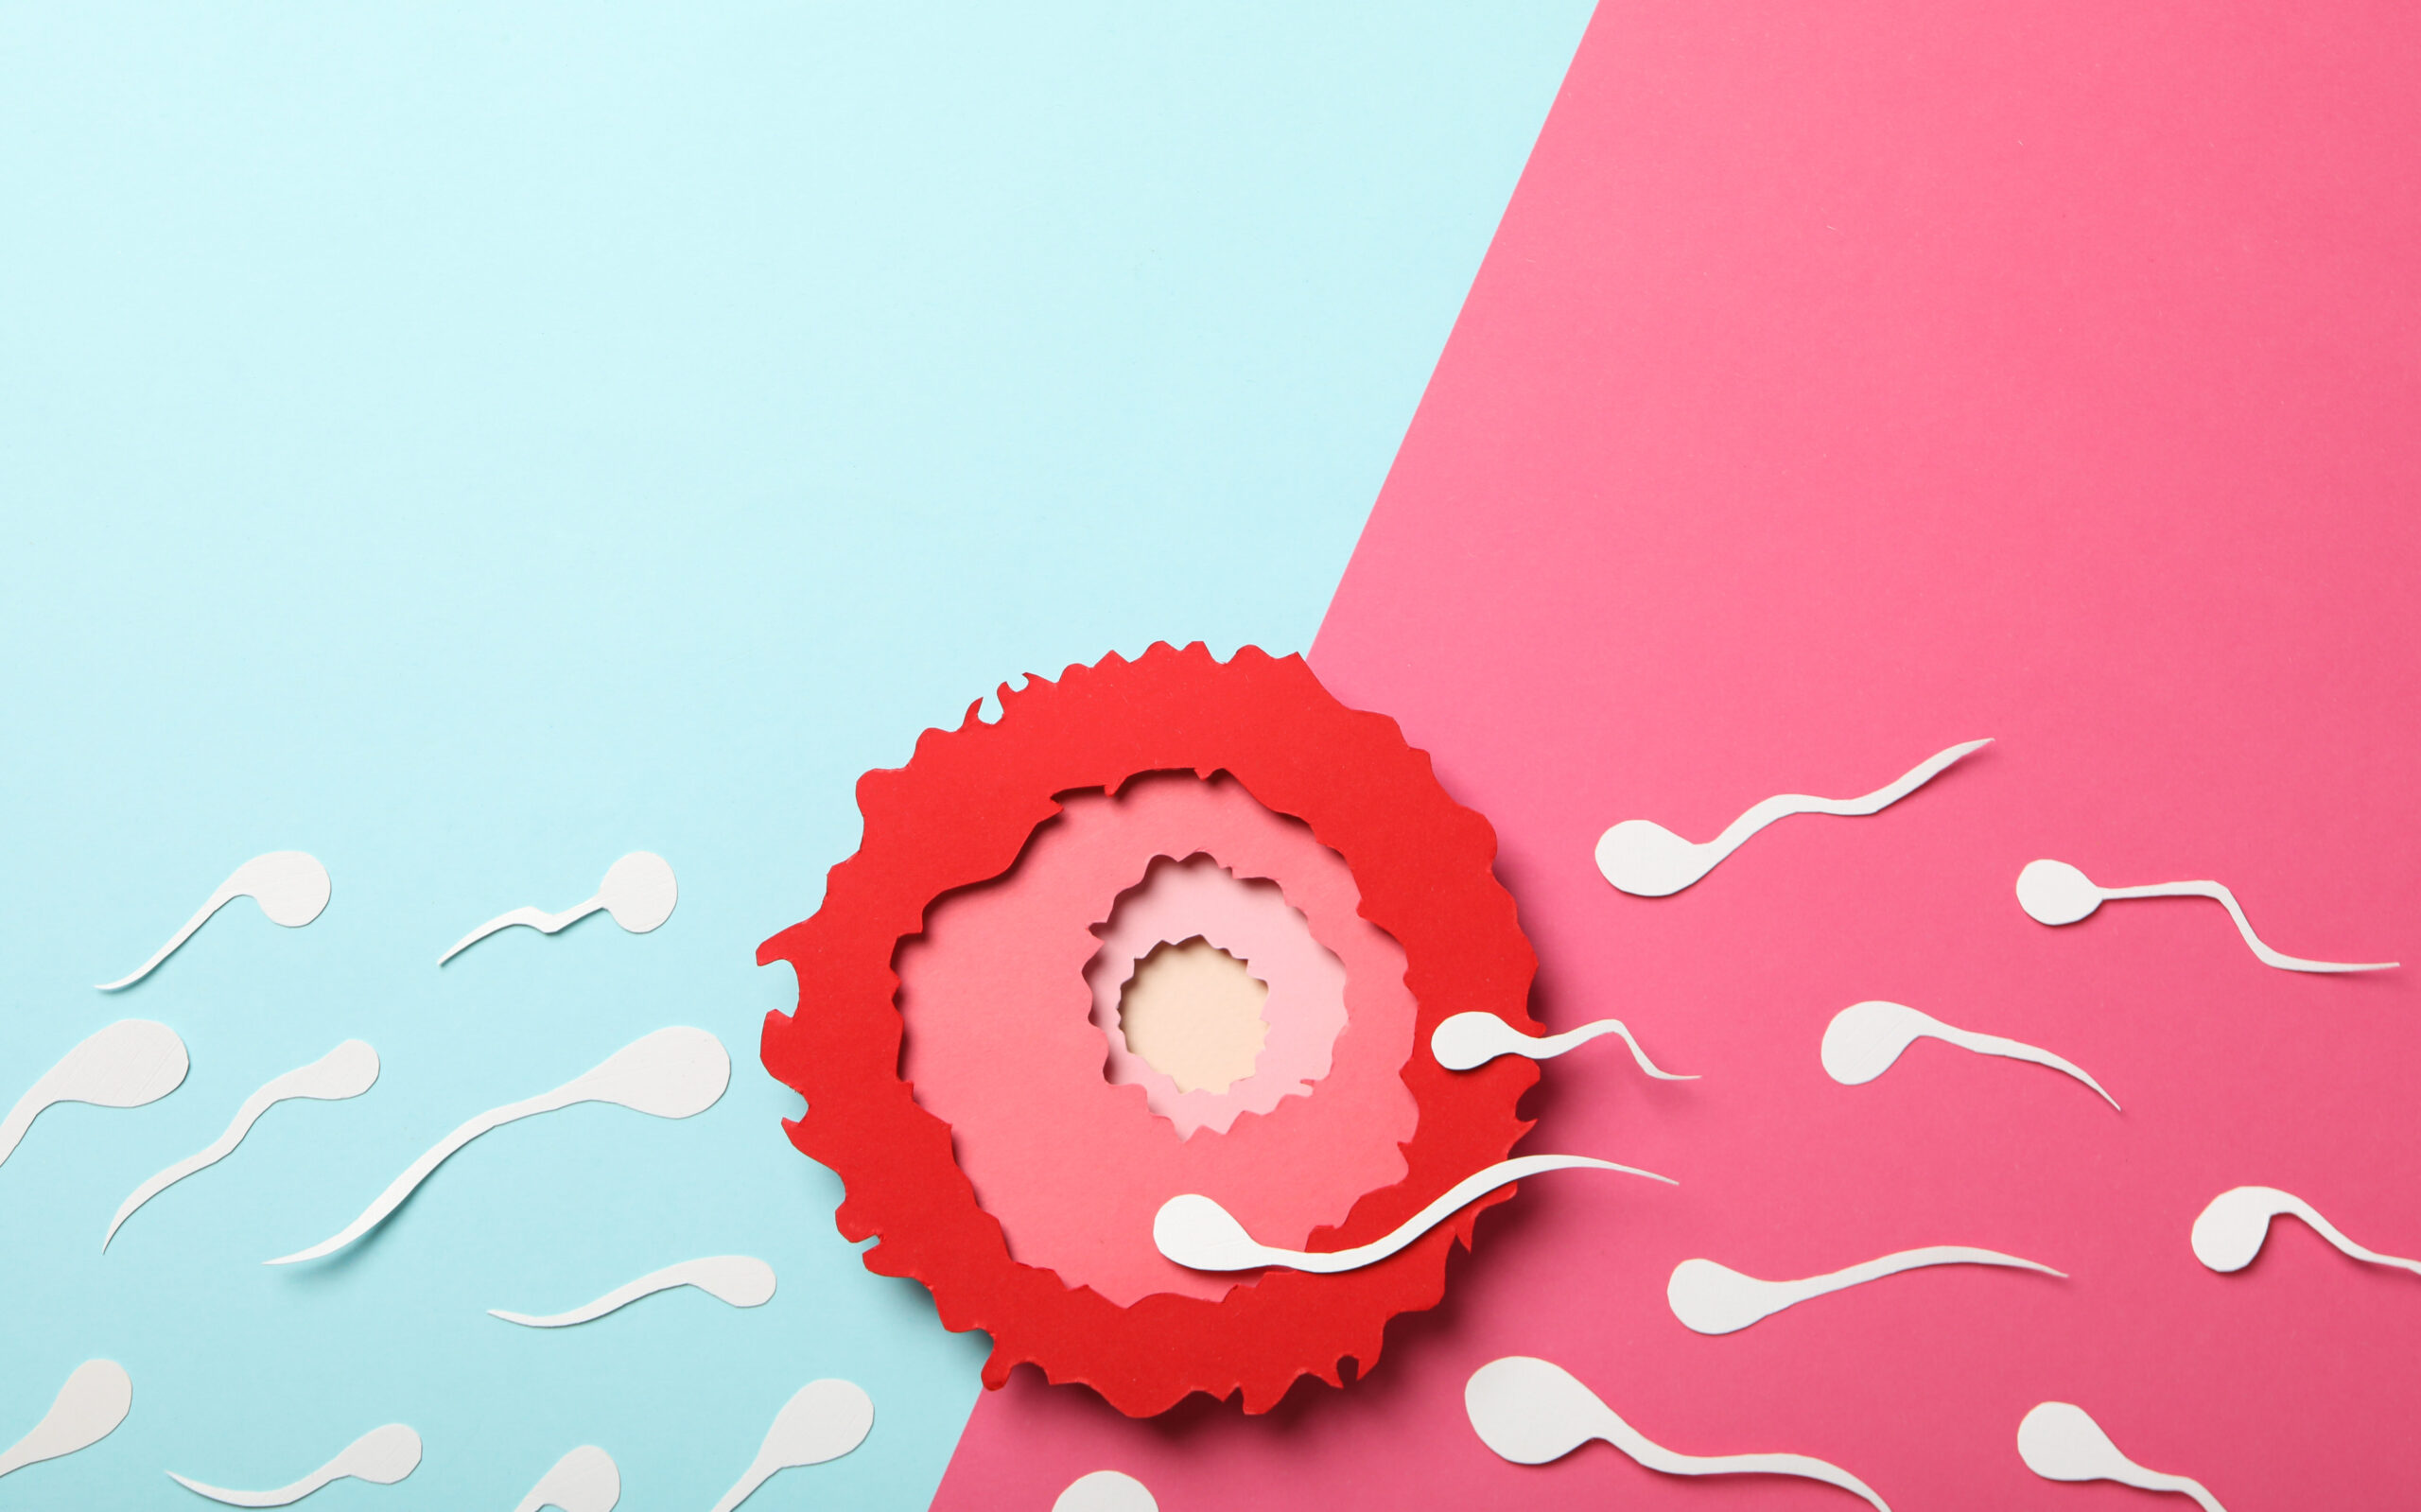
Fertilization
Here’s where the real magic unfolds. Your eggs and sperm are combined in the lab, giving them the chance to unite and create embryos. This can be done either by mixing sperm with eggs or by injecting a single sperm into each egg (ICSI – Intracytoplasmic Sperm Injection).
Skilled embryologists closely monitor this process, ensuring the ideal conditions for fertilization to take place.
You will receive an update with how many have fertilized the day after egg collection.
Embryo Development
The lab cultures the fertilized eggs to develop them into embryos. For a fresh transfer, which is suitable if you’re not at risk of OHSS, the transfer is typically scheduled five days after egg collection (counting the day of collection as day 0). However, if there’s a low egg yield, a history of implantation failure, or previous issues with embryos not reaching day 5, you might be advised to opt for a day 3 transfer.
Updates of Embryo Development
On day 3, some clinics provide an update on the progress of the embryos, including any that may have stopped developing, please be mindful that not all clinics provide a day 3 update. By day 5 post-egg collection, you will generally be informed about the number of embryos that have reached the blastocyst stage, their grades, and their suitability for testing. It’s common for labs to continue culturing embryos until day 7, especially if they haven’t reached the blastocyst stage by day 5. As a result, it’s not unusual to have embryos that are ready on days 6 or 7. Updates are typically given on both of these days, if applicable.
Any embryos not being used for a fresh transfer will be frozen.
PGT-A test results can take 1-8 weeks depending on what lab you are using. On average, you should receive results 2-3 weeks after the biopsy.
Transfer!
Finally, the long-awaited embryo transfer. An Embryo Transfer is where one or more embryos are placed into the uterus with the hope of achieving a pregnancy. The procedure is fairly quick and painless.
Depending on your plan, you may prepare for your transfer with medications for up to 3 months prior, however, the majority of Frozen Embryo Transfers (FETs) take place the cycle following your egg collection.
Embryo Transfer Process
- Preparation: Before the transfer, the embryos are transferred in order of quality and development (highest quality first). The number of embryos to be transferred is determined based on various factors like the age of the woman, the quality of the embryos, and previous IVF attempts. However, the majority of transfers are a single embryo. Hormonal medications may be prescribed to prepare the lining of the uterus for implantation.
- No Anesthesia Required: The embryo transfer procedure is usually painless and doesn’t require anesthesia. Some women might experience mild discomfort similar to a Pap smear.
- Transferring the Embryo: The procedure is performed in a sterile room, similar to an operating room. You’ll lie on a gynecological table, and a speculum is inserted into the vagina to access the cervix, similar to a routine gynecological exam.
- Loading the Embryo(s): The selected embryo(s) is/are loaded into a thin, flexible catheter. The embryologist usually does this under a microscope in a lab adjoining the transfer room.
- Ultrasound Guidance: In many clinics, the transfer is guided by abdominal ultrasound to ensure precise placement of the embryo(s). This helps the doctor to see the best location in the uterus for the embryo(s) to be placed.
- Inserting the Catheter: The doctor gently passes the catheter through the cervix and into the uterus. Once in the correct position, the embryo(s) is/are released into the uterus.
- After the Procedure: The catheter is withdrawn and checked by the embryologist to ensure the embryo(s) has/have been expelled. After the procedure, you will rest for a short period (usually about 30 minutes) before going home.
- Post-Transfer Instructions: You may be advised to take it easy for the next couple of days, although normal activities can often be resumed immediately. Hormonal support, usually in the form of progesterone, is often continued to help support the early stages of pregnancy.
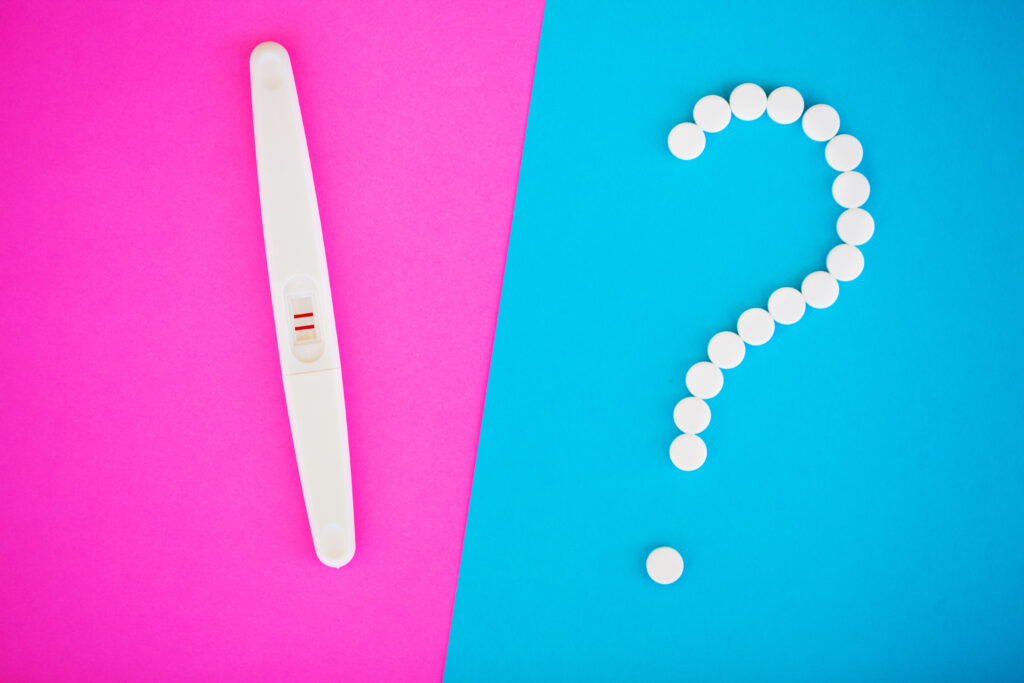
- Waiting Period: The period following the transfer is often described as the “two-week wait,” as you will typically return to the clinic about two weeks later to take a pregnancy test to determine if the procedure was successful.
- Managing Expectations: It’s important to have realistic expectations as not all embryo transfers result in pregnancy. The success rate depends on various factors, including the age of the woman, the quality of the embryos, and any underlying fertility issues.
Outcome
Normally, you’ll have two HCG blood tests between days 9 to 14 after your embryo transfer. These tests are done to check if your HCG levels are doubling, as this is a key indicator of a viable pregnancy.
If your HCG levels are lower or not doubling as expected, your clinic might request additional blood tests. This is a standard precaution and doesn’t necessarily indicate a negative outcome; it’s just a way for the clinic to monitor your progress closely.
In case of a positive pregnancy test, you’ll typically be scheduled for an ultrasound scan between 6 to 9 weeks of pregnancy. The exact timing can vary as clinics have different protocols. After this scan, and if all is well, you’ll usually ‘graduate’ from your IVF clinic to regular prenatal care.
If the transfer is not successful, it’s common to have a review appointment with your specialist to discuss any potential adjustments to your treatment protocol. However, it’s often advised to stick with the same protocol for at least two transfers before making changes.
Should you face a negative outcome, you might be eligible for another transfer in the cycle immediately following your negative test, depending on your specific circumstances and your clinic’s guidelines.
FAQ
What is IVF and how does it work?
IVF, or In Vitro Fertilization, is a fertility treatment where eggs are fertilized by sperm outside the body in a lab. The process involves stimulating the ovaries to produce multiple eggs, retrieving these eggs, fertilizing them with sperm, and then transferring the resulting embryo(s) into the uterus.
How long does an IVF cycle typically take?
A typical IVF cycle, from the start of ovarian stimulation to the embryo transfer, can take about 4-6 weeks. In some cases, you can have a fresh transfer as quickly as 16 days after starting stims. The timeline can vary based on individual responses to treatment.
Is the egg retrieval process painful?
The egg retrieval is usually done under anesthesia or sedation, so you shouldn’t feel pain during the procedure. Some women experience mild discomfort or cramping afterward, which generally subsides quickly.
How many embryos are transferred during IVF?
The number of embryos transferred depends on various factors, including the woman’s age, embryo quality, and individual clinic protocols. Often, a single embryo is transferred to reduce the risk of multiple pregnancies.
What is the success rate of IVF?
Success rates vary depending on factors like age, fertility issues, and the clinic. Generally, younger women have higher success rates. Your fertility specialist can provide more personalized information.
What should I expect during the “two-week wait” after embryo transfer?
The two-week wait refers to the period before taking a pregnancy test after embryo transfer. It’s normal to feel anxious during this time. You’re advised to resume normal activities but avoid strenuous exercise.
Can I try IVF again if it doesn’t work the first time?
Yes, many couples undergo multiple IVF cycles. Your doctor will review your treatment and may suggest adjustments for subsequent cycles.
Are there side effects to IVF medications?
IVF medications can cause side effects like bloating, mood swings, and headaches. Severe side effects are rare but should be discussed promptly with your doctor.
How do I choose a sperm donor if needed?
Sperm donors can be selected through a sperm bank, where you can choose based on various characteristics. All donors undergo extensive health screenings.
What support is available during the IVF process?
Fertility clinics often provide counseling services. Additionally, support groups and online communities can offer valuable emotional support and advice from those who have gone through similar experiences.
Conclusion
Embarking on your IVF journey is like stepping into a new world, filled with hope, anticipation, and a bit of mystery. My aim with this guide is to light up the path a bit, helping you to see the steps ahead with a bit more clarity and a little less worry. Remember, your journey is as unique as you are – what happens in one person’s experience may unfold differently in yours. The beauty of IVF is in its personalization, tailored to your own body’s rhythms and needs.
I encourage you to keep a dialogue open with your fertility team – they’re your partners in this adventure, after all. Curiosity and questions are your allies here. And when the going gets tough, lean on the strength of the community around you and here at Fertility Spot. There’s a whole world of people out there who understand just what you’re going through and are rooting for your success.
Whether you’re just starting out or already in the midst of things, remember: that you’re on a journey to something wonderful. You’re not alone, and each step you take is a step closer to your dream.